NAVIGATION BAR

Showing posts with label How to root Micromax A70. Show all posts

Tuesday, June 5, 2012

Root HTC Amaze 4G On Android 2.3.4 Gingerbread Permanently With ‘One Click Root

Root HTC Amaze 4G On Android 2.3.4 


Gingerbread Permanently With ‘One Click 


Root


VIDEO TUTORIALS


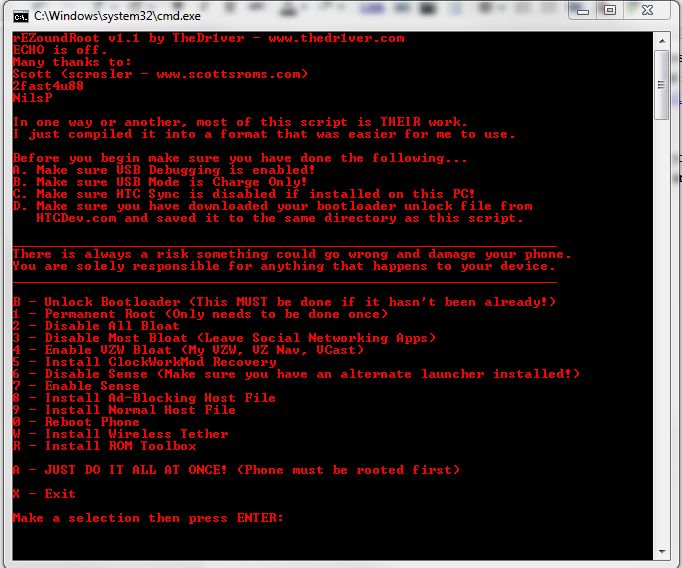
Good news, folks! The critically acclaimed HTC Amaze 4G can now be rooted! If you’ve got one and want to be able to install root-only apps like Titanium Backup, then follow our guide after the jump!
2011102114084430
The root tool comes from developer xboarder56 over on popular forum for Android hacking / development XDA-Developers.
From XDA:
Hi,
guys this is a One Click Perm Root tool and its verified working. Even after reboot no more bricks like the old one Crack eyes made. It will root your phoneand it will stay rooted after multipule (sic) reboots. Enjoy.
How To Root HTC Amaze 4G With One Click Permanent Root Tool
DISCLAIMER: Redmond Pie is not to be held responsible for any loss of data as a result of the malfunctioning of your HTC Amaze 4G in the following of this guide. Follow at your own risk.
Note: This root will be permanent or temporary based on the state of your bootloader. If it is locked, the root will be temporary and you will have to re-root every time you restart your device. However, if it has been unlocked, root will be permanent. You can follow this guide on XDA to unlock your bootloader.
Alright, so before we get down to it, we suggest you download these files beforehand so that the actual rooting process can be done quickly.
Although the process shouldn’t take more than 5 minutes to complete, be sure to ensure that your HTC Amaze 4G has enough charge to last through the rooting process. If your device runsout of battery during rooting, there is a chance that you might brick it.
Step 1: Install HTC Drivers on your computer so that One Click Perm Root can detect your HTC Amaze 4G properly.
Step 2: Connect your device to your computer through USB.
Step 3: Enable USB Debugging on your HTC Amaze 4G from Settings > Applications > Development.
Step 4: Extract Zerg_Root_OneClick.zip (which you downloaded before Step 1) to C:\ and launch ZergRushTempRoot.bat
Step 5: Your HTC Amaze 4G will now be rooted. The process will take up to 3 minutes.
Step 6: Reboot your device.
uploadfromtaptalk1319036602622
If you need help or have any queries, visit the official thread on XDA-Developers.

Monday, June 4, 2012

Root and ClockworkMod Recovery for HTC Desire S


Root and ClockworkMod Recovery for HTC Desire S on HBOOT version 2.00.0002 even with S-ON


The HTC Desire S was a direct upgrade to its predecessor, the HTC Desire, with twice the RAM, a secondary camera, and a whole bunch of other new features.  With every official update there always comes a price, and for rooted Desire S owners, it could be a nightmare.
Updating to official firmware releases can be a great source of new features and functionality, however it could also make your phone lose root access in the process.  If you’re running an HTC Desire S with HBOOT version 2.00.0002, then you don’t have anything to worry about. Continue reading the rest of this guide as we teach you how you can root your HTC Desire S with HBOOT version 2.00.0002.

Warning

Rooting your device can void your warranty. We will not be held liable if anything should happen to your device. Proceed at your own risk.

Requirements

  • HTC Desire S with unlocked bootloader.  Follow the official instructions for unlocking the bootloader at HTCDev.com.
  • A Windows PC
  • Software for extracting RAR archives (e.g., WinRAR, 7-Zip)
  • Disable Fastboot on your HTC Desire S. You can do this by heading to Settings > Power > Fastboot.
  • Enable USB Debugging on your device. You can do this by heading to Settings > Applications > Development > USB Debugging. Make sure that there is a check mark beside that option.
  • Install the HTC drivers for your phone.  You can do this by installing HTC Sync.
  • Disable or uninstall HTC Sync on your PC. This is to ensure that it doesn’t interfere with the process.
  • Ensure that a microSD card is inserted into its slot on your phone.

Instructions

  1. Download SuperOneClick 2.2 from here (SuperOneClickv2.2-ShortFuse.zip, 1.83 MB) and save the ZIP file to your computer.
  2. Extract the ZIP file’s contents into a folder on your computer.
  3. Connect your phone to your PC via USB cable.
  4. When your phone prompts you for a connection type, choose “Charge only.”
  5. Open the extraction folder.
  6. Right-click on SuperOneClick.exe and choose to run the program as Administrator.
  7. In SuperOneClick, select “AUTO” from the drop-down list for exploit.
  8. Click the Root button and wait for the process to complete.
  9. Download adb-fastboot-win.rar (6.6 MB) and extract the contents into a folder on your computer.  Make sure the files are inside the extraction folder, not inside a subfolder.
  10. Download ClockworkMod Recovery for the HTC Desire S (cwm-4.0.1.4-saga.img, 4.2 MB).  Rename the file to recovery.img.  Copy the file into the same folder where you extracted the ADB and Fastboot files to.
  11. Unplug your phone from your PC.
  12. Switch the phone off completely.
  13. Hold down the Volume Down key and press the Power key.  This will bring the phone to the HBOOT screen.
  14. Connect your phone to the PC via USB cable.
  15. On your phone, press the Power button once to bring the phone into Fastboot USB mode.
  16. Open the folder where you extracted the ADB and Fastboot files to.  Double-click oncommandprompt.bat to open a command prompt from inside the folder.
  17. At the command prompt, type fastboot flash recovery recovery.img and press the Enter key.
  18. Reboot the phone.
Congratulations! You have successfully rooted your HTC Desire S on HBOOT version 2.00.0002 and installed ClockworkMod Recovery.

HOW TO ROOT HTC Rezound


HOW TO ROOT HTC Rezound


Video tutorial


I've spent pretty much all day on this and wanted to get it out as soon as possible. There have been a lot of scripts floating around there that have a lot of great features, but not one that single-handedly did everything I wanted for my specific Rezound. Therefore, I've developed rEZoundRoot to help make the Rezound rooting process a little easier.

All you have to do is download the .zip file and extract it to somewhere on your hard drive. Then, copy your unique Unlock_code.bin that you obtained previously into the /tools/ folder and run the script. Follow the instructions and you're good to go!


UPDATE 1/4/2011: Fixed some typos, changed the recovery to install Amon Ra instead of Clockwork Mod, and fixed an issue where adb did not wait for the device before pushing ZergRush... Sorry for those who were having issues with getting root from the script.

UPDATE 1/31/2012: Actually added the Amon Ra recovery.img to the package. Previously had overlooked this and it was still installing the old version of Clockwork Mod.

UPDATE 3/5/2012: Updated to version 1.5 in order to reflect the most recent rooting process. Got rid of the Zerg Rush method because it's pretty much irrelevant now. Allows for either temp or perm pushing of Amon Ra recovery, which allows for the pushing of Superuser and SU per the provided instructions. Eventually I'd like to include the stock RUU in order to get those of us who didn't grab the OTA download all set up, but for right now I'm leaving it out to cut down on size. As always, leave questions in the comments. By the way... In case you haven't noticed by now, the text in the screenshot is red. The text in the actual program is blue. I'm not color blind, I'm just too lazy to update the screenshot... But you already knew that, didn't you?

Root Micromax A85 Superfone

Root Micromax A85 Superfone


Micromax A75 is one of cheapest Android Phones. Due to Micromax branding, phone has done good in terms of sales, Thanks to brand awareness of Micromax and their marketing. It is lighter version of Micromax A85 Superfone, and both the phones are not known for high level performance. It is having tough competition from Samsung Galaxy Y, but those who purchase these phones are not satisfied with them at all. The most common reason is these phones can’t be rooted, and there are only few custom ROMs being developed.


Other disappointing point for advanced users was that they are unavailable to root these phones. But, now it is no longer impossible task. Since, an Android Developer, Ninad Chaudhary has developed the ways to root these both phones. Obviously, steps are tricky, and you need technical knowledge to apply this process. In due course of this article, we are going to show you how you can root Micromax Superfone A85 and Micromax Superfone A75 Android phones. We have tried to simply process for you, to make it easy to root your Micromax Devices, in two different sections, based on A75 or A85 Phone models.
Disclaimer: Rooting your Micromax Superfone A85 or A75 would void warranty. There is risk involved in this process, as your device can get bricked, damaged, or even can stop working after trying to root. This tutorial article is meant for educational purpose more, and doesn’t offers any warranty or liability against each step. We or developer should not be held responsible if anything happens wrong with your device, after following the steps, you should try the steps at your own responsibility. Though, we have not got chance to test this phones personally, so you should take care before rooting these phones.
Pre-Requisite
  • Download Latest Micromax Drivers installed in your PC, and also ensure that you have Data Cable available to enable connectivity of phone with your PC.
  • You need to make sure that your Micromax Phone have battery charge at least 70% before starting the rooting process.
  • Backup all the data, including SMS, Data, Call Logs, Contacts, APN and MMS Settings, and everything else, as this method would wipe all the data from the phone.
  • Disable Firewall or Antivirus Apps in your device, to eliminate the conflict.
  • Enable the USB Debugging Mode in your phone, navigate to “Settings > Applications > Development > USB debugging”. You have to disconnect the phone from computer to turn on the USB debugging mode. As per developer’s suggestion, you can install ADB Drivers from other sources, if device drivers are not available.

Part 1: How to Root Micromax A85 Superfone on Android 2.3.4

Step 1: You need to download Micromax A85 Rooting Package and extract it in you PC. Download Link.
Step 2: After downloading the file, open the archive and find the file named boot.img’ from the 2.3.4 upgrade package to the ‘new-boot.img, ensure to remove the original file before replacing.
Step 3: Flash the phone with provided boot.
Step 4: Connect the Micromax Device to Computer. Ensure that it is connected successfully in Device Manager of your PC.
Step 4: After connecting the device, open the directory of extracted package, and find and run the file ‘run_me.bat’..
Step 5: Your phone has successfully rooted, and you have installed BUSYBOX.
If you have faced any problem while installing or trying to Root the device with above mentioned steps, you should consult with developer here.

Part 2: How to Root Micromax A75 Superfone Lite

Developer Ninad Chaudhary has done awesome Job, he has finally developed method of Rooting Micromax A75. The same root can be applied for Fly IQ270. As you might aware, this phone was not rooted by anyone else, but now it is possible with this tricky tutorial. All you need to follow the steps carefully.
Step 1: You need to Download ROOT4.7z
Step 2: Check the system.img extracted file for checksum using HASH TAB.
for SHA512
FEFB2F46622F0F5B0166F8B1696DB0A6E82E98CC05F43D3005 C9C2493B1BB92D3F363E83E883E7956BDBD495C6AC9EF43A5F DFB5F703F5566D39BA772745C002
for Whirlpool
C0C3F3954C5514A0FC4AE4A60FBA1C38AFB97B82064CECDB3D 0C513AD8F13CDA70310DA024D53A8CB4FC3F5D7BC40479EF67 CF3AF3D180F9DC31ADFB621C877A
Step 3: Now, you need to replace the System.img from the update package, which you have downloaded. For yoru comfort, here are those instructions:
  • You need to download three files. Flash Files | SP flash tool | Drivers
  • Install the drivers you downloaded, and then restart the device to complete the drivers installation.
  • Now, run Flash Tool (Downloaded in Step 1), and then select scatter file ‘MT6573_Android_scatter.txt, and in ‘Downloading Agent’ select MTK_AllInOne_DA.bin. Ensure to uncheck the Preloader option.
  • Now, run the Download. If 404 Not Found Error is coming, simply select files one by one, which includes DSP_BL, UBOOT and few more.
  • When interface asks the phone to connect to the PC, then simply turn off the phone and now plugin. In the few minutes, your phone is flashed.
Step 4: Then flash the device, using instructions in update. After doing this, you need to restart your Micromax A75 Superfone lite.
Step 5: Your device has been rooted. But it is reported that the phone users had faced Wi-Fi connectivity issues after installing this Root. Firstly you should try to Reset the IP. If nothing works, then simply do the following:
  • Download Wi-Fi Fix Patch, which would fix permissions as well. If USB Debugging mode is enabled, connect the phone to PC.
  • Find the file. ‘run_me.bat’ from the package, and run the same file, which will Install Busybox and also will fix Wi-Fi issues in your phone.
If you face any difficulty or problem while using this procedure, you can ask directly to developer.

Sunday, June 3, 2012

Root Micromax A73


Root Micromax A73


Micromax A73 Dual SIM Superfone Buzz has lots of amazing features. The looks that the phone has are something one would die for. Here are the leading specifications of the handset that would make the picture clearer:

Micromax A73 Features and Specifications

  • 3.5-inch Capacitive Touchscreen
  • Dual GSM SIM
  • Running on Android 2.3 (Gingerbread)
  • Powerful 650 MHz processor
  • 2 MP Full Focus Camera equipped with LED flash
  • Expandable memory up to 32GB with MicroSD
  • FM Radio
  • 1300 mAh battery
  • 3G (HSDPA 7.2 Mbps and HSUPA 5.76 Mbps),Wi-Fi 802.11 b/g/n, Bluetooth 3.0, USB 2.0, GPS
Of course, owners of this Superfone Buzz may be flying high because they are getting such hi-tech features in their android that would surely give them the best level of satisfaction. But some apps that have been loaded on A73 are completely useless and thus you may want to get rid of them. Now, here comes the need to root Micromax A73.
Rooting procedures are mind boggling because they help in making the android device free and, post rooting the user has complete control over the operating system. This provides real thrill to those who want to enhance the features and user experience on their android. But rooting is actually a risky procedure. Thus we recommend that people with not so good technical knowledge must keep away from such procedures. Just read the disclaimer as given below before rooting.
Disclaimer: Rooting an android phone makes the warranty of the phone void. Apart from this, some other risks that may be involved include the risk of bricking, risk of the phone getting damaged as well as loss of important data. Thus we recommend that you should not root the phone unless and until you have the desired confidence levels or at least you know what you are doing.


Note: It is important to note that developer msj003 on android forum has tested this rooting procedure successfully just a few days back. We rely on this information and provide you the rooting procedure in that context.

Root Micromax A73

Download Unlock Root tool from here: http://www.unlockroot.com/ on your PC.
Now, check USB debugging. This can be done on your phone with: Settings->Applications and enabling the USB Debugging.
Keep the phone charged to the extent of 60-70 percent. This is because, if in between the procedure, the charging gets drained, the entire process will go waste.
Open Unlock root tool and click on Root.
Select the device.
Now, just wait for a while. You are done.
Soon, after the procedure is over your device will achieve root access. Once you root the phone, you can remove bloatware, add important apps and manage your Android independently.

 Some more information about Unlock Root Tool

Talking about Unlock Root Tool it is important to note that with this one can root about 250 different handsets. Many manufacturers are covered under this and most popular of them like  HTC, Motorola, Sony Ericsson, Samsung,  Huawei, Dell, Asus and Acer. Many other less-known manufacturers models are also covered.
With the help of Unlock Root, even the first-time rooters won’t face any problems and also there is no tension of the android device getting bricked. This tool supports Android Eclair 2.1, Froyo 2.2, and Gingerbread 2.3. In the short time you will also be able to expect support for Android 4.0 Ice Cream Sandwich because there is a lot of demand for this on the customers’ part. Now, with the help of this tool as available at the official website of Unlock Root, you can root your high-end or entry-level android device.

How to root Micromax A70


How to root Micromax A70


Rooting comes with several pros and several cons. While you decide to root an android you must weigh the risk benefit ratio and based on that you must move ahead. For app developers and android developers this is a passion. I am sure they would never get into such weighing measures or so. These geeks would be desperate to test the root process. Micromax A70 is an amazing android device, but not much has been tried, tested and written about this. I am sure many new developers might have tried rooting Micromax A70, but might have remained unsatisfied with the results. But in reality, rooting and unrooting Micromax A70 is very simple as compared to other Android phones. The credit for this simple procedure goes to ‘Z4 Root app‘. So, here’s the Step by Step Process to know How to Root Micromax A70 and Install Custom ClockworkMod Recovery 4 with Rom Manager. But before you try that read the disclaimer as given below:
Disclaimer: It must be noted that we shall not be responsible for any damage caused to your Micromax A70 due to rooting procedure. However, if you have any doubts you can contact us and we will surely help you. Androidust.com has produced the given information with care but rooting the phone makes its warranty void. Root it at your own risk.

Root Micromax A70 step by step

  1. The first step is to download Z4Root v1.3 from here.
  2. After that install it using any file manager.
  3. Now enable USB Debugging with this way, go to settings>applications>development and enable usb debugging.
  4. Now after that start Z4Root and click on root.
You will be given a choice that whether you wish to root Micromax A70 with complete root or soft root. The basic difference is, when you wish to do unrooting of complete root, you will have to use the same app again along with hard root. In case of soft root merely rebooting the device will unroot the handset.

Difference between Soft root and Hard root.

Soft root: Many people just want to try rooting to test something or just to try it out to see how’s theperformance after the phone is rooted. They might not want their phones to be rooted permanently. For them, soft root is handy since once the phone is restarted, it reverses all the rooting process done and makes the phone unrooted as it was earlier before rooting. So once you switch off your phone after this process, the root access is gone !


Hard root: This method will root your device permanently and it stays rooted even after restarting your phone. This method is mostly used. Even though this root is permanent, this can also be reversed if you want with the same rooting tool. Since rooting voids the phone’s warranty, unrooting or reversing the process comes in when you need claim the warranty.

ClockworkMod Recovery with ROM manager app

Note: This process is not needed if you want to only root your phone. This process will only help you to enhance the features of your rooted phone.
Now, since you have rooted the phone, it would be great to try ClockworkMod Recovery with ROM manager app. This is something that will make your Android phone highly functional. With this functionality you can take up partitioning your memory card, zip file flashing etc. For this procedure you will require a Rooted Micromax A70, the device battery to be charged at 50-60% for avoiding any sort of hampering, ROM manager App ( You can download it from Android market from your phone:  ROM manager ) and internet connection on your phone. Before you start download and install ROM manager App from Android Market or Google play now. Once you have installed that, follow the instructions below:

InstructionsROM manager on Micromax A70

  • First open ROM Manager and then select the Flash ClockWorkModRecovery (The first option).
  • Once you do that, you will get the list of devices as pop up and you need to select A70.
  • Now, let the download complete. This will definitely take some time and also it will install a few files.
  • When this is done tap Reboot Into Recovery.
  • Congrats, your Micromax A70 will be reboot into ClockWorkModRecovery.
It is vital to note that in this you will now have to use volume rocker for up and down movement and the power key will be the button for selection. Also if you have a Micromax A75 with you then you can check out how to root Micromax A75 here.